Simple Custom Scrollbar

Scrollbars are great for displaying a lot of information within a small area. Despite their importance, we often take scrollbars for granted. For example, your browser window should display a scrollbar on the right side of this page for allowing you to easily scroll down. We don't really think about them;- we just expect them to be there when the need arises.
Yet, creating a scrollbar is trickier than using one. In this tutorial, you will learn how to create your own compact, easily customizable scrollbar in Flash. Even though Flash comes with several scrolling components, the scrollbar you will be creating allows for easier customization along with a significantly smaller file size compared to its built-in variation.
The following is an example of what you will be creating:
[ click and drag down on the blue square to scroll through the content ]
Creating a Scrollbar:
- Okay, let’s get started by downloading the provided incomplete source below. Don't worry, the partial source only contains the content that you will be scrolling:
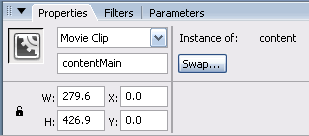
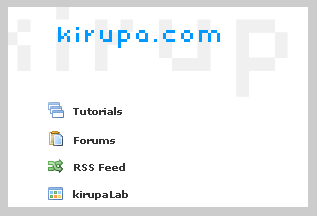
- Once you unzip and open the scrollerIncomplete.fla file, all you should see is a large movie clip containing some text and images. Select the movie clip and give it the instance name contentMain:

[ give your content movie clip the instance name contentMain ]
- Now, we need to create a mask that will only display the portion of the content we would like to see. Insert a new layer and call it mask.
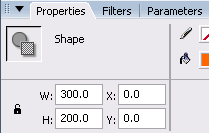
- Make sure your newly created mask layer is selected. On the stage, draw a medium sized square. Select your square, and enter the following values in the Properties panel for the square:
- Width: 300
- Height: 200
- X: 0
- Y: 0
You are basically creating a 300x200 rectangle that covers up your entire drawing area. Your Properties panels should look similar to the following image:

[ ensure your rectangle is 300x200 with a x/y offset of 0 ]
- Select your rectangle and press F8 (Modify | Convert to Symbol). Select the option for Movie Clip and press OK.
- With your rectangle converted to a movie clip, let's give it an instance name. Ensure the newly converted movie clip is selected. In the Properties panel, give it the instance name maskedView:

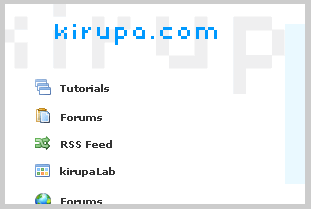
- With your rectangle created and properly sized, right click on your mask layer and select Mask. You will notice that your contentMain movie clip only takes up the space filled by your rectangle:

[ your content is no longer overflowing from the stage; it is masked ]
On the next page, you will add the scroll track and the scroll face (dragger). You'll have a fully functioning scrollbar in no time!
you masked the content so that your users do not see everything at once. In this page, you will create the scrollbar and related accessories that will allow you to scroll through the content easily.
Let's pick up from where we left off:
- Create a new layer and call it scrolltrack. Ensure that you have selected this layer.
- Draw a tall rectangle without a border. For the fill color, give it any lightly-colored background. To be more accurate with the size, let's enter the width, height, and x/y offsets using the Properties panel.
Select your newly drawn rectangle and enter the following values into your Properties panel:
- Width: 20
- Height: 160
- X: 280
- Y: 0
Your rectangle should now be placed on the right side of your movie:

[ your rectangle is located on the right side of your movie ]
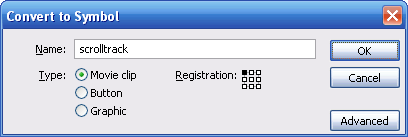
- Select your rectangle again. Press F8 (Modify | Convert to Symbol). The Convert to Symbol dialog window should appear. Give it the name scrolltrack, select the option for Movie Clip, and then press OK:

[ convert your rectangle to movie clip ]
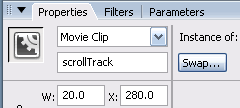
- With your rectangle now a movie clip, let's give it an instance name. Select the scrolltrack movie clip (formerly the tall rectangle) and give it the instance namescrollTrack from the Properties panel

[ give your newly converted movie clip the instance name scrollTrack ]
- Let's add our scrollFace (the thing you click and drag) now. Create a new layer, and give it the name scrollface.
- With your scrollface layer selected, draw a small rectangle on your stage. Give it a darker fill color than your scrollTrack rectangle. Select your rectangle, and in the Properties panel, enter the following values:
- Width: 20
- Height: 40
- X: 280
- Y: 100
Your rectangle should look similar to the following:[ the rectangle that will eventually become your scroll face ]
- Let's now turn the square into a movieclip. Select the square, press F8 or go to Modify | Convert to Symbol. Give it a name such as scrollface, select the option for Movie Clip, and press OK.
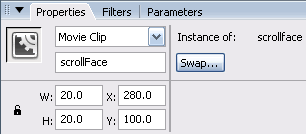
- Now, select your rectangle (now a movie clip), and give it the instance namescrollFace:

[ give the scrollface movie clip the instance name scrollFace ]
On the next page, let's add our up and down buttons and add our code!
On the previous page, you added the scroll track and scroll face. Let's finish up the interface on this page by adding our up and down buttons. I will also provide the code needed to get everything working.
Let's continue from the previous page:
- Create another new layer and give it the label buttons.
- Draw two squares with each square having a width and height of 20 pixels. The squares will represent the up and down buttons for the scrollbar.
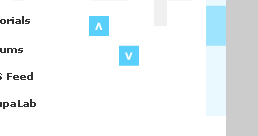
- Now, draw an up arrow on one square and a down arrow on another. I simply draw a small v and an upside down small v instead:

- We need to convert each of these squares into button movie clips. Select one square (and its arrow) and press F8 (Modify | Convert to Symbol). From the Convert to Symbol Dialog window, select the option for Movie Clip and press OK.
- Repeat the same process as Step xiv for your other, unconverted square. In the end, both of your squares should be movie clips.
- Select the movie clip with the up arrow. In the Properties panel, enter the following values for X and Y:
- X: 280
- Y: 0
Now, select your movie clip with the down arrow. Enter the following X and Y values for it in the Properties panel:
- X: 280
- Y: 180
Your interface should look like the following image:

- We aren't done with the interface quite yet. Select your up movie clip and give it the instance name: btnUp. Likewise, select your down movie clip and give it the instance name: btnDown.
- Now, we are done with our interface! Let's add some code. Create a new layer and label it actions. Right click on the first (and only) frame on that layer and select Actions. Copy and paste the following code into your Actions panel:
- Test your movie by either previewing it in the browser by pressing F12 or preview the file in Flash by pressing Ctrl + Enter. You now have a fully functioning scrollbar.
Phew. That was fun. Now, let's learn how to use our scrollbar in a real movie with other content, layers, and data.
No comments:
Post a Comment