| ||||
3
4To get the flames rising, we're going to use the Wind filter. This filter only works going to the left or right, so we have to rotate our canvas first. Choose Image->Rotate Canvas->90 CW. Make sure the middle layer is still selected and choose Filter->Stylize->Wind. Select "Wind" and "From the Left" in the options and click OK. We need more wind than one application of the filter provides, so hit Cmd-F four times (or cntl-F if you're on Windows) to apply the filter four more times. You can use more or less applications depending on how high you want the flames to go. Finally, rotate the canvas back to normal with Image->Rotate Canvas-> 90 CCW. This is what it should look like now:  | ||||
5Now we need to make the wind streaks look more like flames by blurring them together. Select Filter->Blur->Gaussian Blur and set the radius to 3 (make sure you still have the middle layer selected). You can use more or less blur depending on how you want the flames to look. Here's what I got so far: 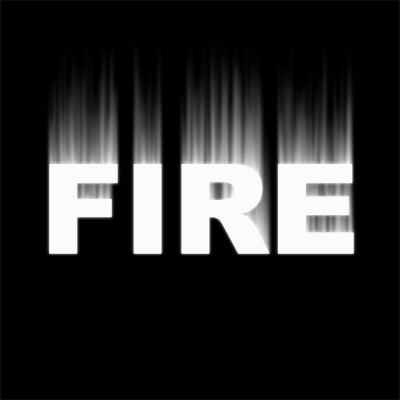 6
Continue to Page 2 -> | ||||

| ||
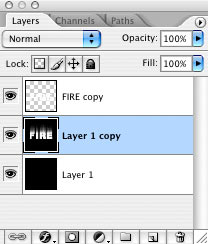
9Duplicate this colorized layer and select this duplicate in the layers palette. Select Image->Adjustments->Hue/Saturation again, this time with Colorize off. Set the Hue to -20 to make the flames red. Set the Blending Mode of this duplicate layer to Overlay. Now we've got some nice looking flames:  10Next we want to add some color to the top text layer that just has white letters at the moment. So click on the top layer to make it active and click on the Lock Transparency icon  | ||
11A Layer Style will be used next to add more depth to the letters. We'll add a Drop Shadow first using the settings shown below. The color I used in the Blend Mode is a shade of orange #ee6a00. 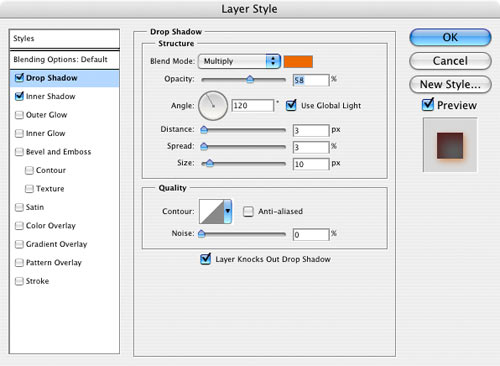 Don't click OK just yet since we have one more thing to set. 12Now we'll add a red Inner Shadow. I used color #ec0606 for the Blend color. 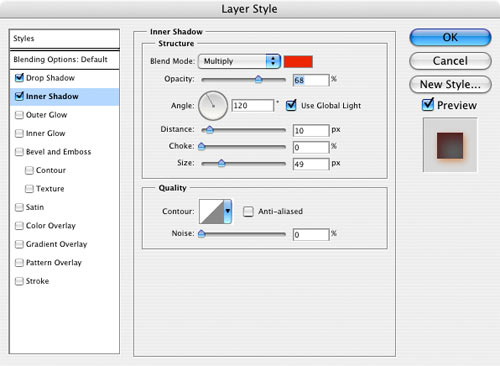 Click OK. Our burning text effect is looking pretty good at this point:  Choose Layer->Merge Visible to collapse all the layers together. You can stop here if the text effect is all you need. But we can also take it further by adding a reflection in the foreground. This is a great way to add more depth and it's quite easy. |


No comments:
Post a Comment