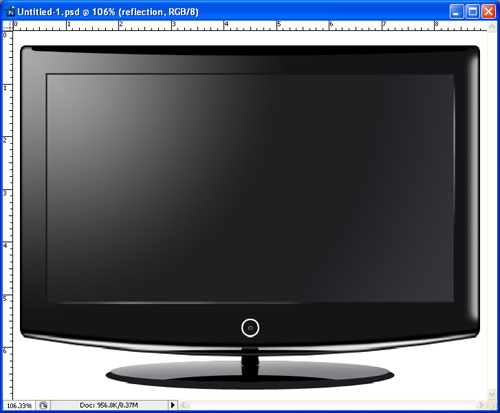
This tutorial will teach you how to create a photorealistic widescreen LCD HDTV from scratch. The LCD HDTV that we will be making is modeled after Samsung's LCD HDTVs.
Author:


End result:
Author:
Views: 61655
Score: 9.49 / 10
Author earned: $75
Step 1
Create a blank canvas (with white background) 9 inches wide by 7 inches high at 72 dpi.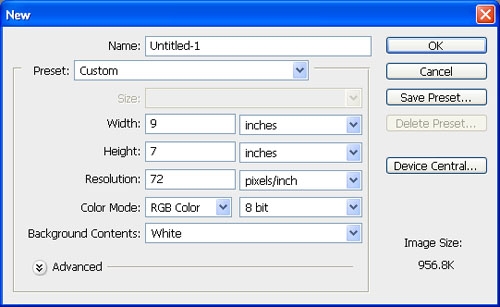
Step 2
Put a horizontal guide at 20 pixels from the top and a vertical guide at 4.5 inches (the vertical center of the canvas). (“View” > “New Guide”)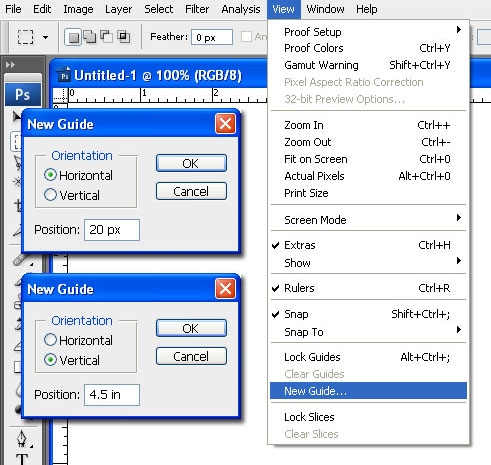
Step 3
Make sure you have “snap to guides” and “snap to document bounds” turned on.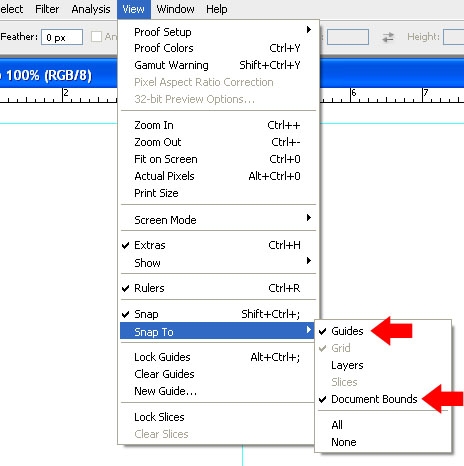
Step 4
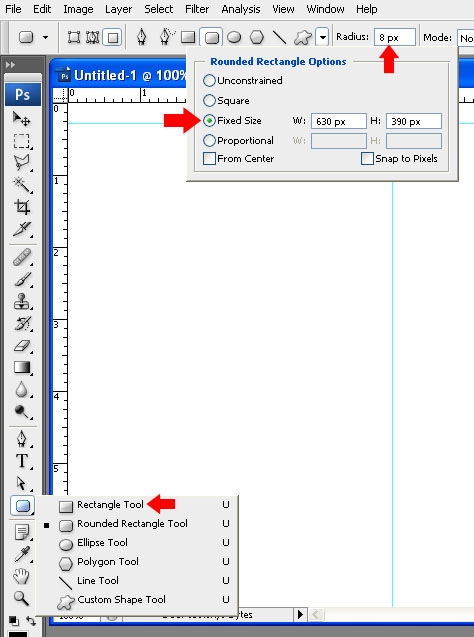
Create a new layer on top of the “background” layer and name it “frame”.Set your foreground color to black (#000000).
Click on the “Rounded Rectangle Tool” and set its radius to 8 px. Also, click on the “Geometry Options” dropdown menu, choose “Fixed Size” and key in “630 px” for the width (W) and “390 px” for the height (H).
Step 5
With the “frame” layer active, click and hold the mouse button on the canvas and move the pointer until you can see the entire shape inside the boundaries of your canvas. Release the mouse button to create the shape. (If you click and release the mouse button with some parts of your rounded rectangle going off the edges of the canvas, the shape will not be filled/rendered in its entirety.)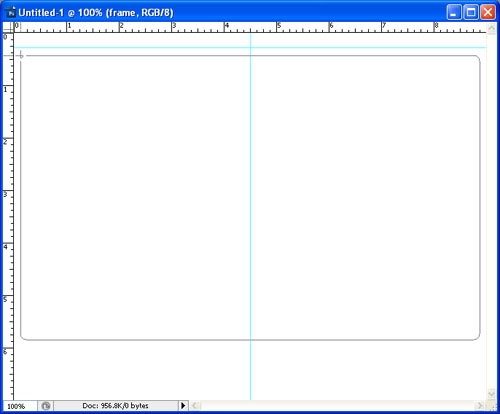
Step 6
Move the rounded rectangle until its top edge snaps to the top guide and its center snaps to the vertical guide.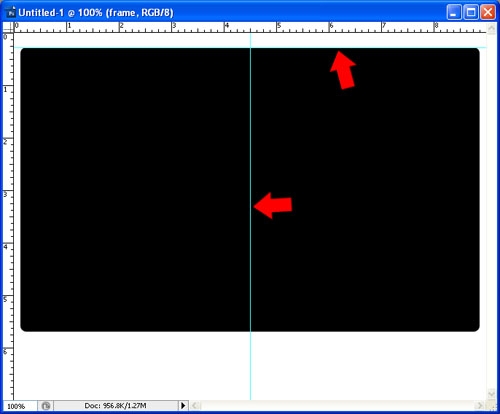
Step 7
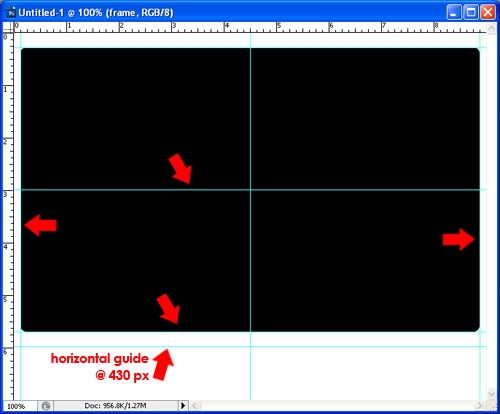
With the “frame” layer still active, drag a horizontal guide and let it snap to the center of the black rounded rectangle and another to the bottom. Also, drag vertical guides and let them snap to the rounded rectangle’s left and right edges.In addition to those guides, put a horizontal guide at 430 pixels down from the top of the canvas. (“View” > “New Guide”)
Step 8
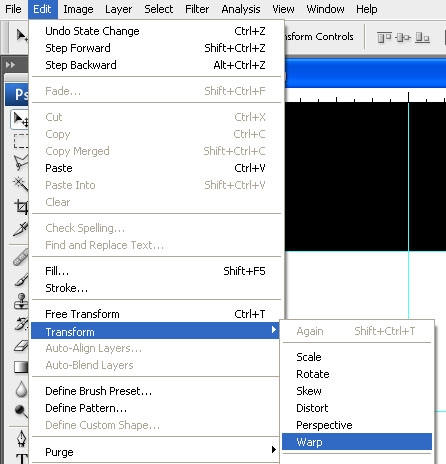
Now, we are going to make the lower edge of the rounded rectangle bulge down a bit. There are numerous ways to accomplish this.For CS2 and CS3 users, you can do “Edit” > “Transform” > “Warp”
Step 9
Align the mouse pointer to the vertical guide (at the center of the canvas) very near the bottom edge of the rounded rectangle and click and drag until it touches the horizontal guide below.
Step 10
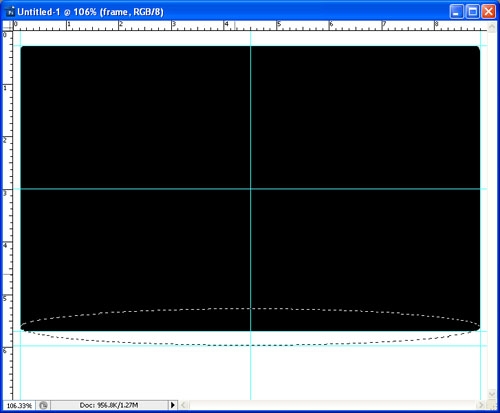
For all others, you can use the “Elliptical Marquee Tool”.Make an elliptical selection similar to the one shown below. Please note that the elliptical selection is exactly as wide as the rounded rectangle. It should also be tall enough that its horizontal center is situated slightly above the bottom of the rounded rectangle with the bottom of the selection touching the guide below the bottom edge of the rounded rectangle.
Step 11
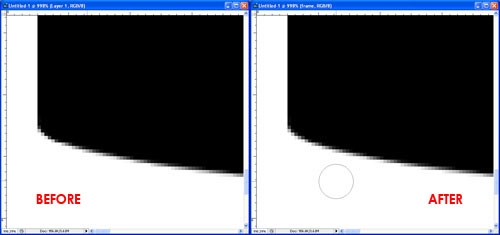
So as not to leave any void spaces when you fill the selection, create a new layer on top of the “frame” layer and fill the selection with black on that layer. Deselect afterwards.To keep things clean, go back to the “frame” layer. Using the “Eraser Tool”, erase the parts of the lower corners of the rounded rectangle extending beyond and below the boundaries of the ellipse you have just created (that is if there are any).
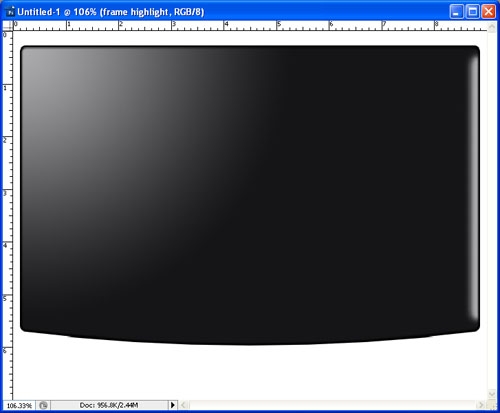
Note: There’s a very slight difference between the before and after screens above, but if you’d take a really close look, I’m sure you’ll be able to see the difference.
Step 12
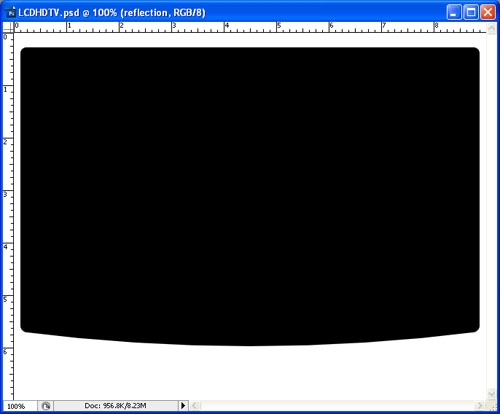
Afterwards, merge that layer down with the “frame” layer”Whichever method you chose to use, you should have a result like this.
Step 13
Load the selection of the “frame” layer by pressing the CTRL key and clicking on the “frame” layer (for CS users, you must click on the thumbnail of the “frame” layer in the layers palette).
Step 14
Contract the selection by 3 pixels (“Select” > “Modify” > “Contract”) and...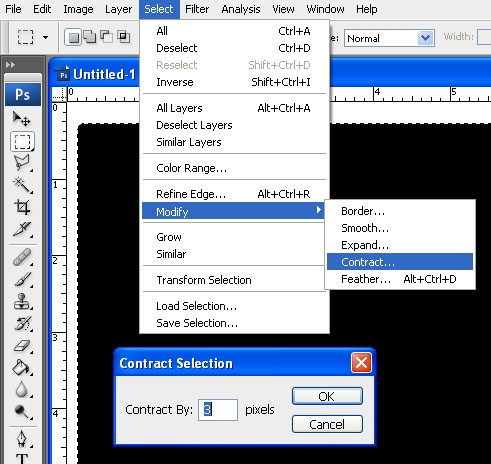
Step 15
...feather it by 1 pixel (“Select” > “Modify” > “Feather”).
Step 16
Create a new layer on top of the “frame” layer and name it “frame highlight”.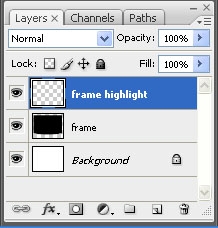
Step 17
Set your foreground color to #adacaf and your background color to #151517.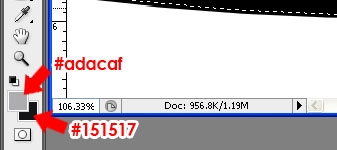
Step 18
With the “Gradient Tool” set to “Radial Gradient” (going from foreground color to background color), click and drag the gradient starting from the upper left corner of the selection to the center of the black rounded rectangle (this would be the intersection point of the vertical center guide and the horizontal guide at the center of the rounded rectangle).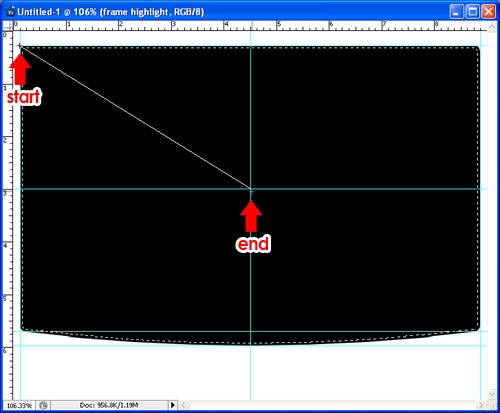
Step 19
You should have something like this: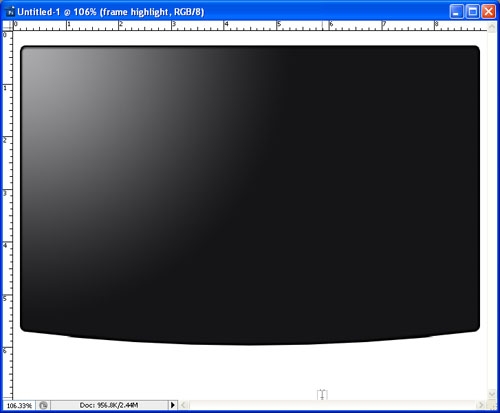
Step 20
With the selection still active, use a 25 px soft brush (set to 100% flow) and paint a straight line (of #adacaf) down the right edge of the selection starting from just below the top right corner and ending just above the bottom right corner of the selection. (Tip: Align the center of your brush with the edge of the selection and hold down the “Shift” key as you click and drag your brush down or up, this will keep your line straight. DO NOT let the your brush/paint reach the corners of the selection as this will not result to a good effect).Deselect afterwards.
You should now have something like this:
Step 21
Create a new layer on top of the “frame highlight” layer and name it “screen”.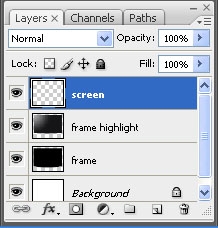
Step 22
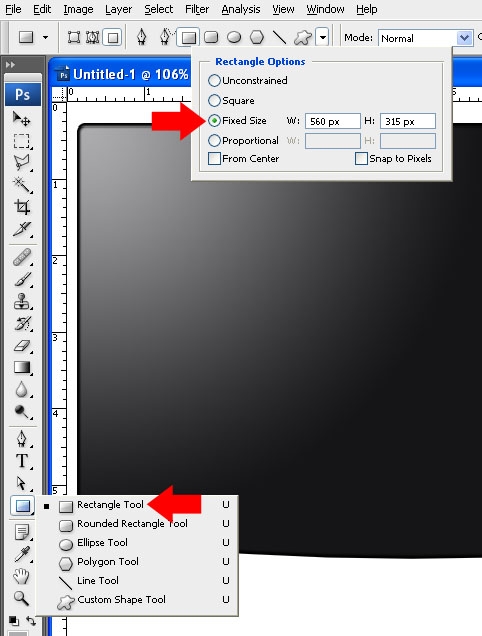
Set the foreground color to #141416.Click on the “Rectangle Tool”. Click on the “Geometry Options” dropdown menu, choose “Fixed Size” and key in “560 px” for the width (W) and “315 px” for the height (H).
Step 23
With the “screen” layer active, click and hold the mouse button on the canvas and move the pointer until you can see the entire shape inside the boundaries of your canvas. Release the mouse button to create the shape.Move your newly created rectangle until it snaps to the center of the black rounded rectangle.
You should now have something like this:

Step 24
Load the selection of the “screen” layer. (Ctrl+click on the “screen” layer in the layers palette)Contract the selection by 2 pixels. (“Select” > “Modify” > “Contract”)
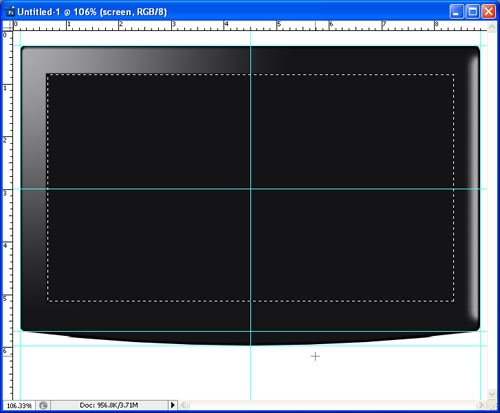
Step 25
Create a new layer on top of the “screen” layer and name it “screen highlight”.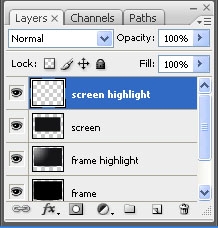
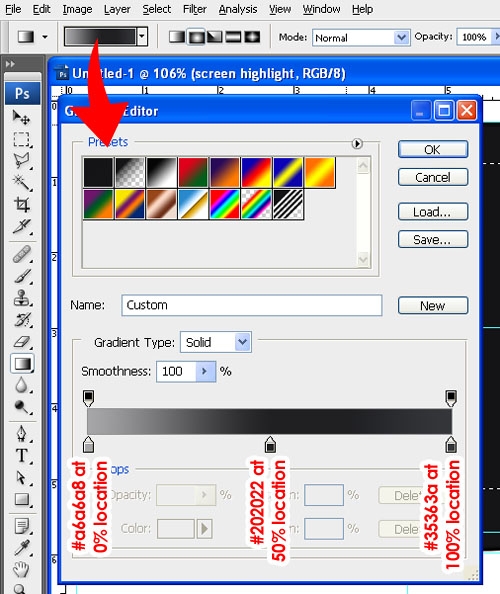
Step 26
Click on the “Gradient Tool” and make a custom gradient using the following colors:#a6a6a8 at 0% location
#202022 at 50% location
#35363a at 100% location
Step 27
With the “screen highlight” layer active, drag the gradient starting from the top left corner of the selection and ending at its lower right corner.Deselect when done.

Step 28
At this point you should have something like this: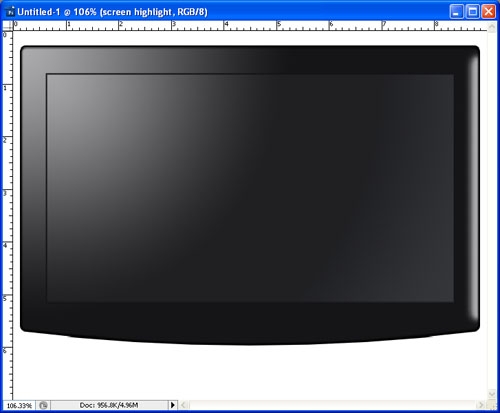
Step 29
Now, we will add a couple of highlights to the dark outline of the screen.Set your foreground color to white (#FFFFFF).
Click on the “screen” layer to activate it and load its selection again.
Using a soft round brush (about 50 px big) with its “Flow” set to 10%, slowly paint in highlights to the upper right and lower left portions of the selection. Careful not to overdo it.
Deselect when done.
(Please refer to the screenshot below as your guide to what you aim to achieve at this point.)

Step 30
Using the “Rectangular Marquee Tool”, create a rectangular selection large enough to cover the lower portion of the “frame” starting from approximately the midpoint between the screen and the original bottom edge of the rounded rectangle.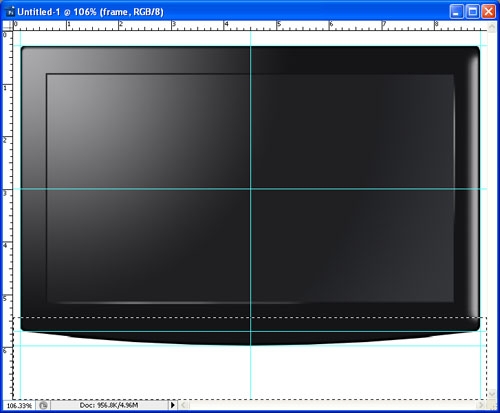
Step 31
Make sure that the “frame” layer is the active layer, press Ctrl+J to copy that portion of the “frame” onto a new layer.Move that layer below the “frame” layer and rename it “lower arch”.

Step 32
Put a horizontal guide at 445 pixels down from the top of the canvas (“View” > “New Guide”).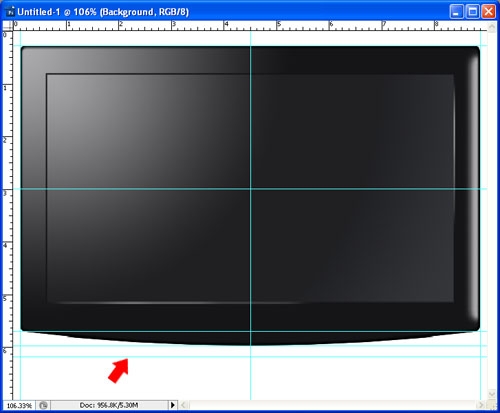
Step 33
With the “lower arch” layer the active layer, press Ctrl+T (free transform) and pull down the bottom-center handle until it snaps to the horizontal guide below it and apply the transformation.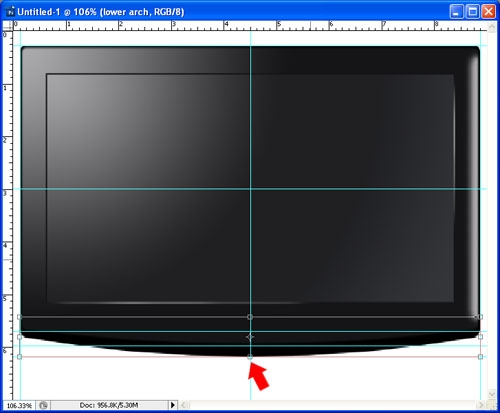
Step 34
Load the selection of the “lower arch” layer. Remove the unwanted portion of the selection by pressing down the Ctrl+Alt keys and clicking on the “frame” layer in the layers palette. You should now have a selection like this:
Step 35
Contract the selection by 3 pixels (“Select” > “Modify” > “Contract”) and feather it by 1 pixel (“Select” > “Modify” > “feather”).Set the foreground color to #cbcccd and the background color to white (#FFFFFF).
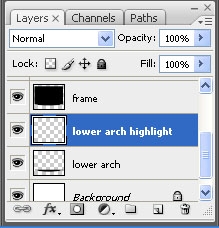
Create a new layer on top of the “lower arch” layer and name it “lower arch highlight”.
Step 36
With the “Gradient Tool” set to “Radial Dradient” (going from foreground color to background color), drag the gradient starting from the center of the selection to either the left or right tip.Deselect afterwards.

Step 37
You should now have something like this.
Step 38
Create a new layer between the “frame highlight” layer and the “screen layer” and name it “frame dark”.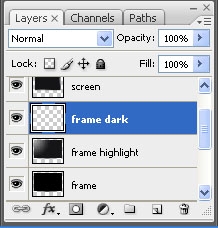
Step 39
Load the selection of the “lower arch” layer. Transform/scale down the selection (“Select” > “Transform Selection”) to 90% width and 25% height.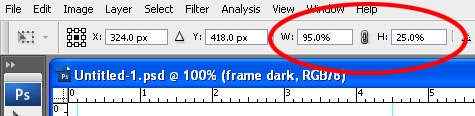
Step 40
Move the selection until its top edge snaps to the topmost guide (make sure that the center of the selection is aligned with the vertical center guide.
Step 41
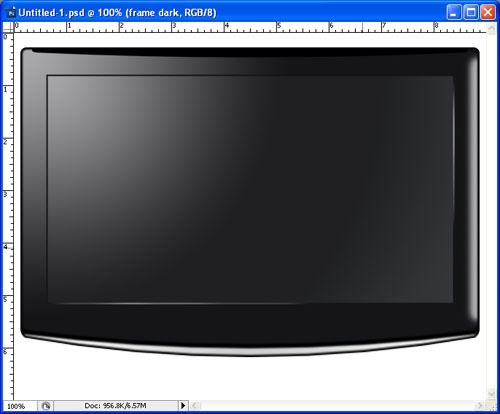
With the “frame dark” layer the active layer, fill the selection with black (#000000).Deselect afterwards.
By now, you should have something like this:
Step 42
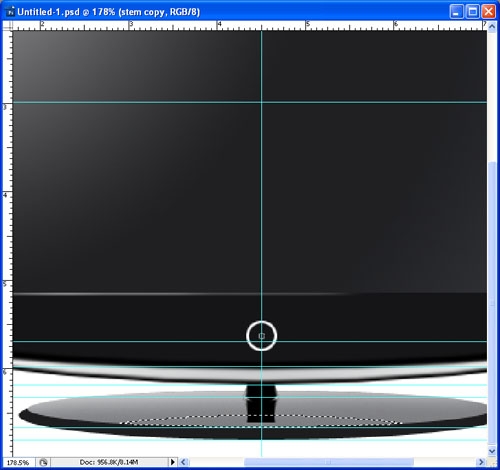
Create a new layer on top of all layers and name it “power”.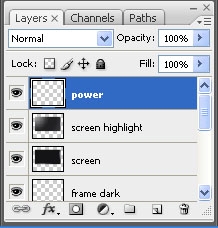
Step 43
Using the “Elliptical Marquee Tool”, create a 25 pixel diameter circular selection. Move the selection to relatively the same place as shown below. Again, its center must be aligned with the vertical center guide.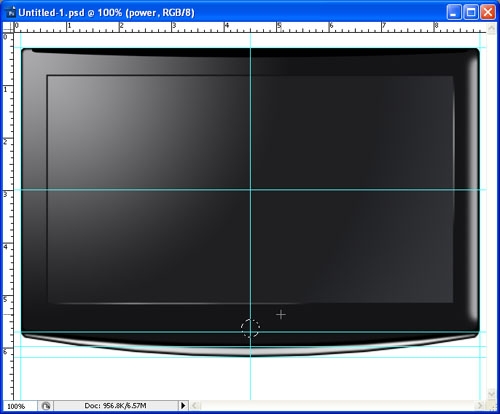
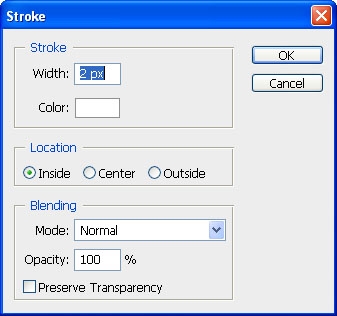
Step 44
With the “power” layer the active layer, stroke the selection with 2 px white (“Edit” > “Stroke”), set the “Location” to “Inside”.Deselect when done.
Step 45
Duplicate the “power” layer and scale down the duplicate to 20% (“Edit” > “Free Transform” and key in 20% for the width and height in the free transform options bar on top of the screen.)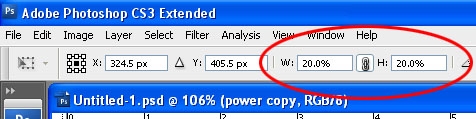
Step 46
Merge the “power” and “power copy” layers. At this point, you should have something like this.
Step 47
Now, create a new layer on top of the “background” layer and name it “stand bottom”.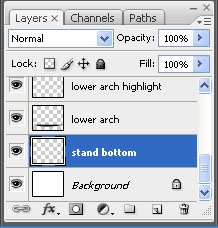
Step 48
Put a horizontal guide at 490 pixels down from the top of the canvas (“View” > “New Guide”).
Step 49
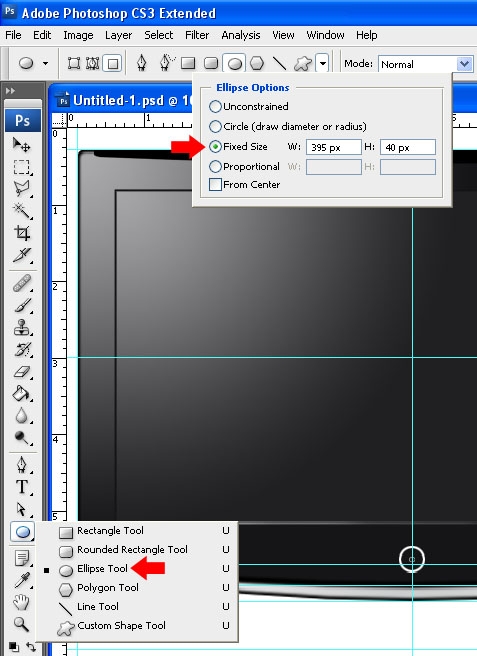
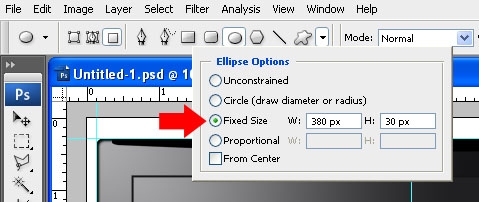
Set the foreground color to #1d1d1f.Click on the “Ellipse Tool”. Click on the “Geometry Options” dropdown menu, choose “Fixed Size” and key in “395 px” for the width (W) and “40 px” for the height (H).
Step 50
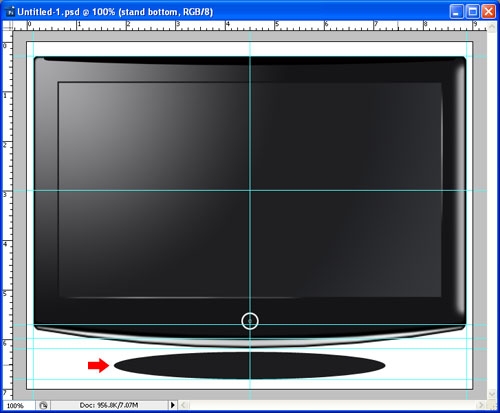
With the “stand bottom” layer active, click on the canvas to create the ellipse.Move your newly created ellipse and let its bottom edge snap to the bottommost guide. Also, make its center snap to/align with the vertical center guide.
Step 51
Create a new layer on top of the “stand bottom” layer and name it “stand top”.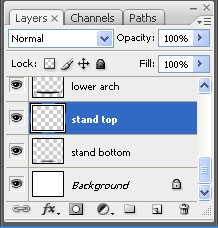
Step 52
Put a horizontal guide at 480 px down from the top of the canvas.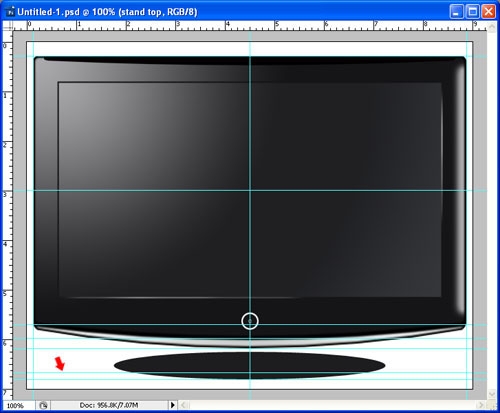
Step 53
Set the foreground color to #7d7e82.Click on the “Ellipse Tool”. Click on the “Geometry Options” dropdown menu, choose “Fixed Size” and key in “380 px” for the width (W) and “30 px” for the height (H).
Step 54
With the “stand top” layer active, click on the canvas to create the ellipse.Move your newly created ellipse and let its bottom edge snap to the guide situated above the bottommost guide. Also, make its center snap to/align with the vertical center guide.

Step 55
Load the selection of the “stand top” layer. With the “stand top” layer the active layer, brush on a bit of a white highlight on the upper left portion of the ellipse with a big soft brush with a low “Flow” setting as shown below (in this case I used a 50 px soft brush at 10% “Flow” and made 5 passes).Deselect afterwards.

Step 56
Create a new layer on top of the “stand top” layer and name it “stem”.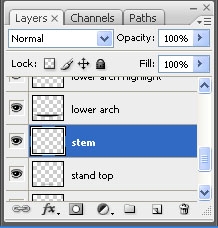
Step 57
Put a horizontal guide at 455 pixels down from the top of the canvas (“View” > “New Guide”).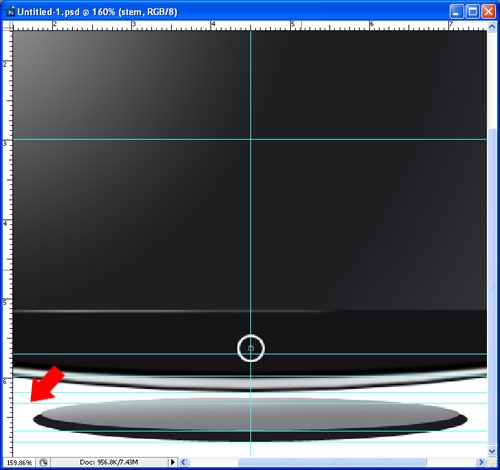
Step 58
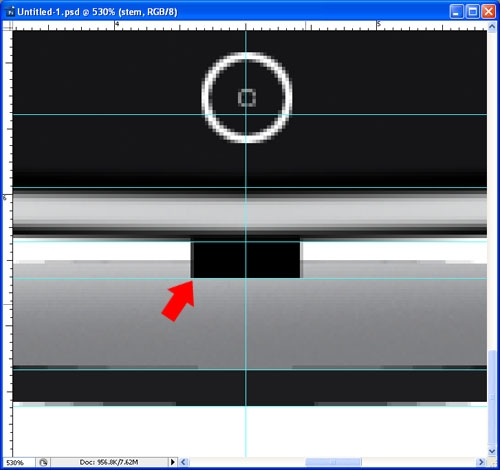
Click on the “Rectangle Tool”. Click on the “Geometry Options” dropdown menu, choose “Fixed Size” and key in “30 px” for the width and “20 px” for the height.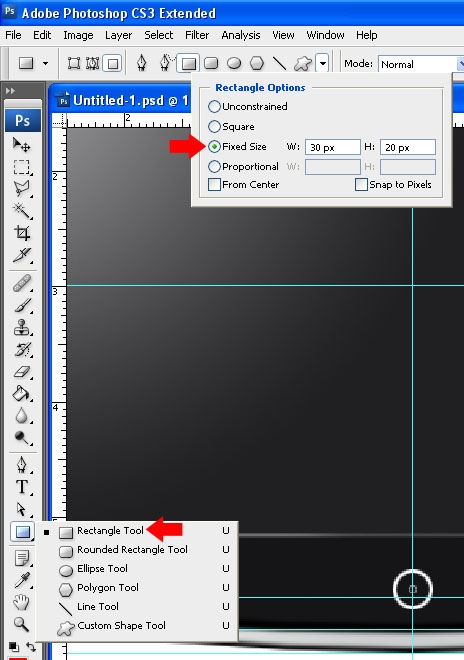
Step 59
Set the foreground color to black (#000000).With the “stem” layer the active layer, click on the canvas to create the rectangle and move it until its bottom snaps to the latest guide you’ve created. Also, make its center snap to the vertical center guide.
Step 60
With the “Elliptical Marquee Tool” create an elliptical selection similar to the one shown below and position it also as shown.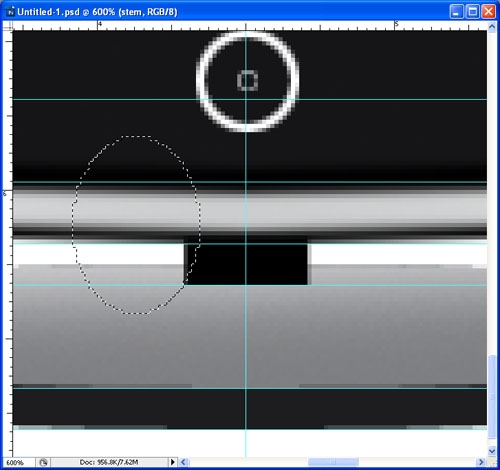
Step 61
With the “stem” layer the active layer, press the “Delete” key on your keyboard. Do the same to the other side of the stem.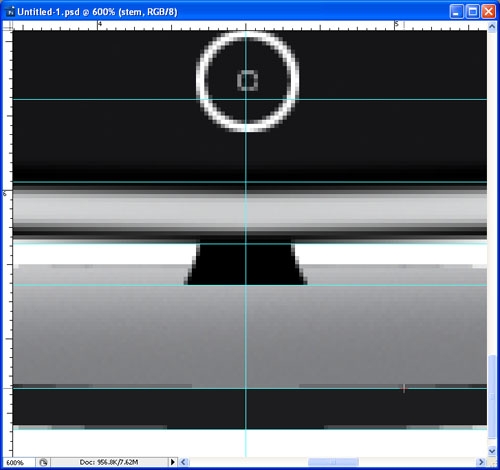
Step 62
Create a new layer on top of the “stem” layer and, with the “Elliptical Marquee Tool”, make a selection like the one shown below.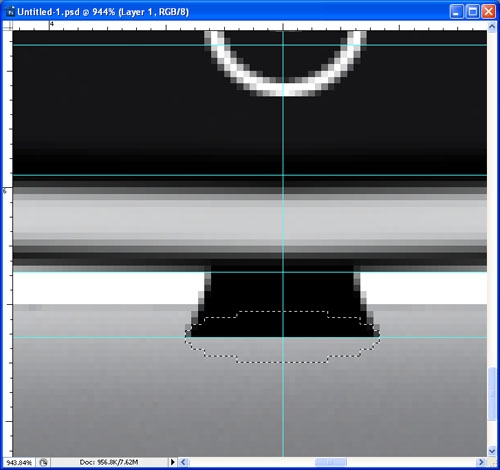
Step 63
Fill this selection with black and merge the layer down with the “stem” layer.This is what you should have by now:
Step 64
Load the selection of the “stem” layer.With the “stem” layer the active layer, paint in highlights to the stem like the ones shown below using the color #ceced0 and a 5px diameter soft brush.
Deselect when done.
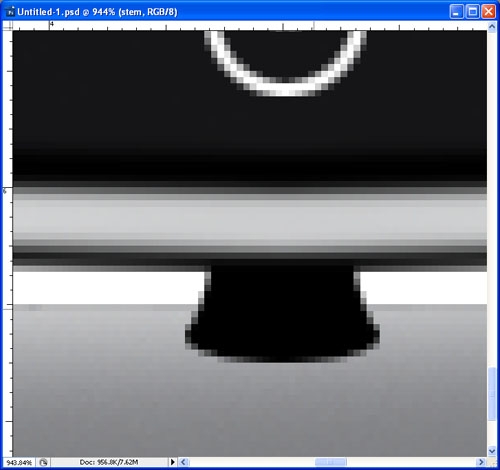
Step 65
Duplicate the “stem” layer and flip the duplicate (“stem copy” layer) vertically (“Edit” > “Transform” > “Flip Vertical”).Position it as shown below.

Step 66
Move the “stem copy” layer to below the original “stem” layer in the layers palette.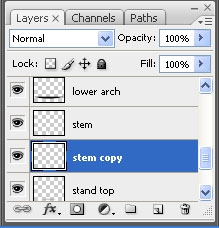
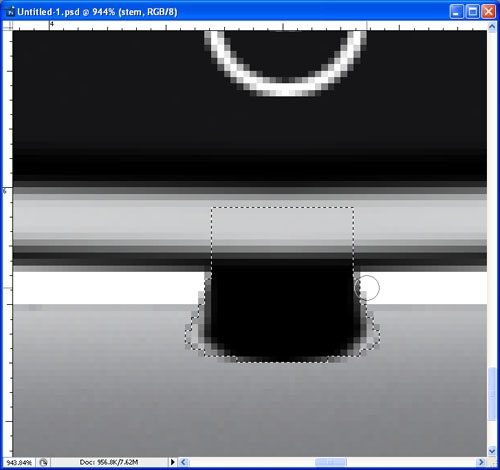
Step 67
With the “Elliptical Marquee Tool”, make a selection like the one shown below. (Note that its center is aligned with the vertical center guide).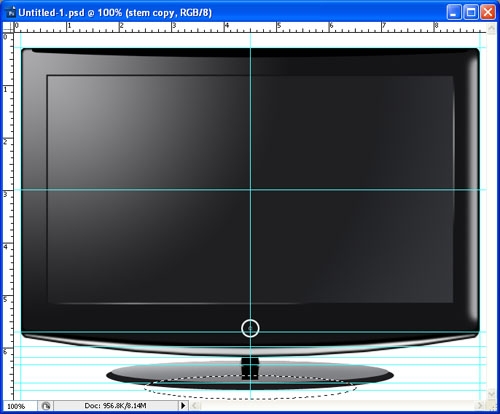
Step 68
Eliminate the portion of the selection extending outside of the “stand top” layer’s ellipse by pressing Ctrl+Alt+Shift and clicking on the “stand top” layer.Your selection should look like this:
Step 69
Create a new layer on top of the “stem copy” layer and fill the selection with black on that layer (you may merge this layer and the “stem copy” layer if you want). Deselect afterwards.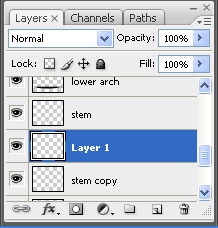
Step 70
You should now have something like this: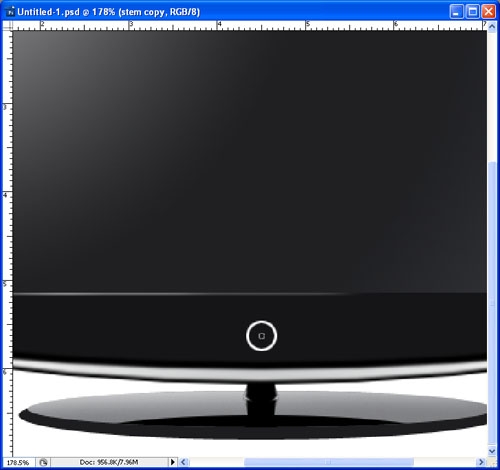
Step 71
Create a new layer on top of the “lower arch highlight” layer and name it “reflection”.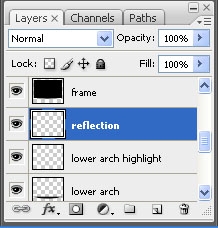
Step 72
Load the selections of the “stem”, “stand top”, and “stand bottom” layers by holding down Ctrl+Shift and clicking on the layers one by one. Your slection should look like this: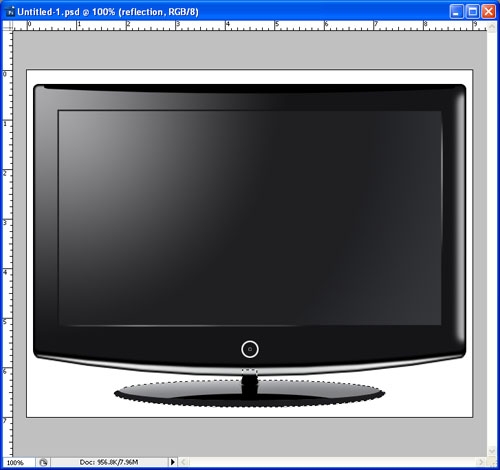
Step 73
With the “reflection” layer the active layer, fill the selection with black and deselect.Afterwards, press Ctrl+t (free transform).
Step 74
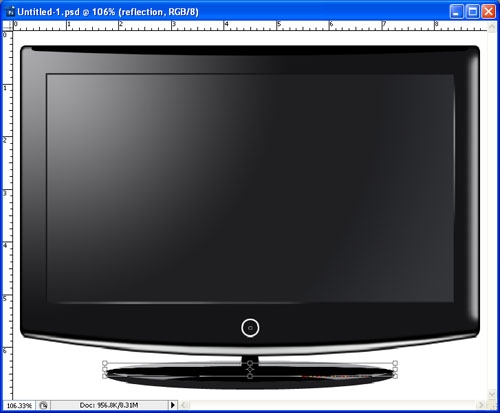
Transform and position the newly filled shape as shown. (Tip: The resulting height should be about one thirds of the original, the width is unchanged).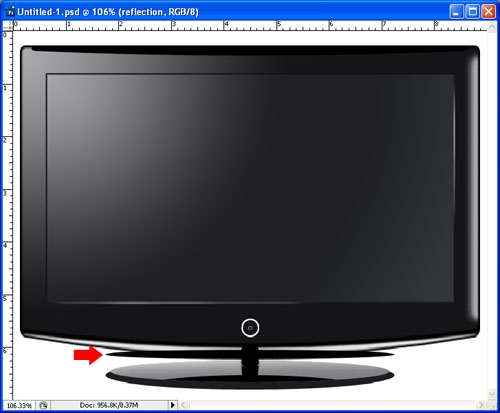
Step 75
Load the selection of the “lower arch highlight” layer and invert it (“Select” > “Inverse”).
Step 76
With the 'reflection' layer the active layer, press 'Delete' on your keyboard and deselect afterwards. You should now have something like this.You're done!
if picture in not showing please comment me
ReplyDelete